Added: 7 August, 2007
Group: Photoshop
Create Your Own Mile Marker Tutorial
Author: Jason
page: 1
Create Your Own Mile Marker Tutorial
Youre not a pointers man but you are keen on miles markers. This simple example is a product of the followed steps you can search in here. Once you find the base start drawing the mile marker form and read carefully tips & tricks.

Note: This tutorial works for Photoshop 7 + up, including Photoshop CS3 (the latest version of Photoshop). In fact, this tutorial was done on Photoshop CS3 but I have started using Photoshop since Photoshop 7 and this should work just fine with it.
Note: Some screen shots will have highlighted region(s) just to attract your attention to certain things. Dont be surprised and wonder why your Photoshop doesnt have such conveniently highlighted regions :).
Terms
Layer thumbnail

Vector mask thumbnail

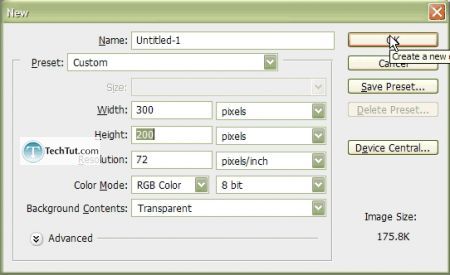
Step 1. Create a new document with size 300px x 200px. Set the usual: RGB, 8 bit, transparency, resolution to 72px per inch, etc.
Step 2. First you might want to refresh your mind on what a mile marker looks like. Search Google Images or something similar. I would also copy & paste one image you like in your Photoshop document just as a reference.
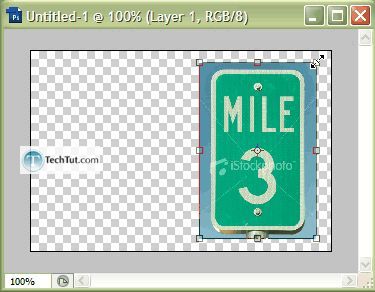
Step 3. Let us finally get started on actually drawing the mile marker form. Notice that mile markers have a white border we can add this in later so dont worry about it. To draw the form well be using the Rounded Rectangle Tool.

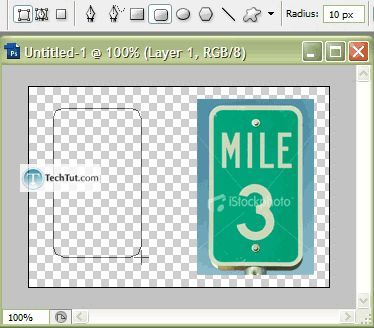
A radius of 10px works just fine.
Now create a new layer, Ctrl + Click on the vector mask thumbnail, and select the color in the image of the mile marker copied and pasted onto the Photoshop document.
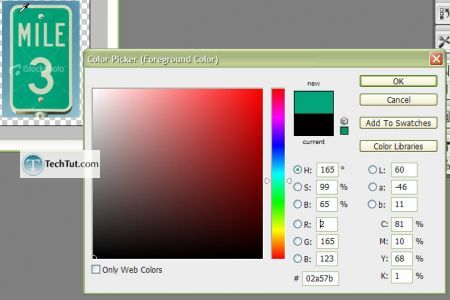
Press Alt + Backspace to fill the select with the greenish color. Now feel free to just drop that rounded rectangle layer (the one we drew not the greenish one) onto the trash can icon to delete it.
Step 4. Its time to add the white outline. Double-click our mile marker layer to access the Blending Options or access it by right-clicking then selected Blending Options . Check the box next to Stroke, change the color to white, and then make sure the size is at 3px or 4px (choose whatever looks best to you).
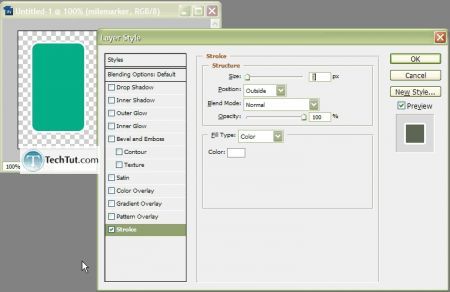
Step 5. Before we add in the text, let us do the reflection/glossiness first. Ctrl + Click the mile marker layer (or rather click the layer thumbnail) and then click on the Create a new layer icon to create a new layer above the mile marker layer while retaining the selection (selection is the moving dashes/dots). Press D to reset the foreground and background to black and white respectively. We want it the other way around so press X. Now fill the selection (Alt + Backspace) and lower the opacity of the layer to something like 45%.
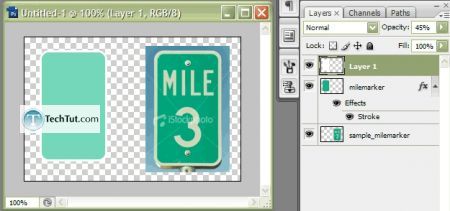
Make a marquee selection like such (A-->B).
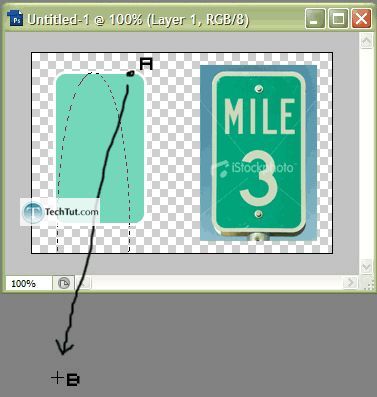
Make another selection while holding down Shift (A-->B).
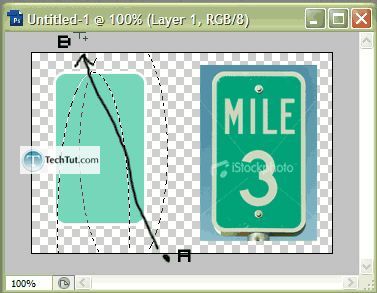
Press Del.
Step 6. Using a font of your choice and using the type tool, type the mile and # on separate layers.
Final:


GO to: Page 1 : Create Your Own Mile Marker Tutorial
TechTut.com This tutorial is copyrighted. Partial duplication or full duplication is prohibited and illegal. Translation or usage of any kind without author�s permission is illegal.

 Join our RSS feed
Use our RSS feed to get the latest published tutorials directly to your news reader.


