Added: 16 August, 2007
Group: Flash
Creating a Flash Photo Slideshow Tutorial
Author: Danny
page: 1
Creating a Flash Photo Slideshow Tutorial
Like to play with photos? Here you can find explanations for creating a photo slideshow in Flash.
Flash CS3 was used during the making of this tutorial but the techniques used make it so that anyone with a version Flash MX 2004 and up.
Step 1. It’s important to get your photos all together first. I’m going to be using 3 images of 3 flowers that I really like

Magnolia

Forget Me Not

Bird of Paradise
So gather you images together into one folder and…open a new document.
Step 2. Now, import the images into Flash and thus into the Library. To open the library window (though its not essentially needed in this tutorial) press "Ctrl + L" or simply go up to Window > Library.
To import you can go the sluggish way and go to File > Import > Import to Stage or go the 1337 way and press "Ctrl + R"
Also, once you have opened that import window, you can simply highlight any number of images to import them all at once.

Step 3. Separate the images into separate layers and rename the layers accordingly. This step is pretty self-explanatory but I’ll go through it with you just in case.
Cut one of the images…
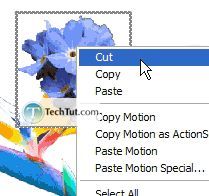
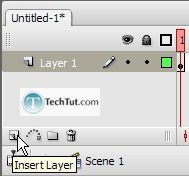
Then, create a new layer…
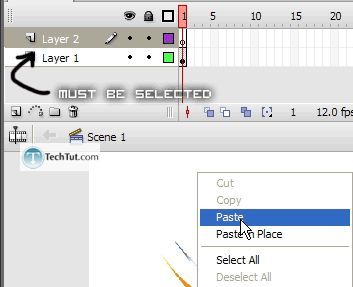
Make sure the layer you just created is selected and then paste…
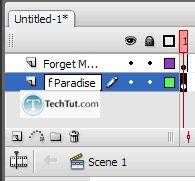
Now rename the layer…
Repeat this step for as many images are remaining.
Step 4. Now we can either decide how long each image should be displayed or just work on 1 image at a time. Feel free to go any which way but in this tutorial, we are going to just start working on the Bird of Paradise and then just worry about how far apart the second flower should be at a later time.
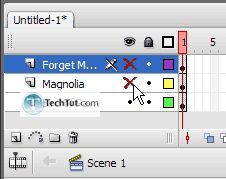
So first, turn off the visibility on the other 2 layers. Then place the flower that you are focusing on in the center.
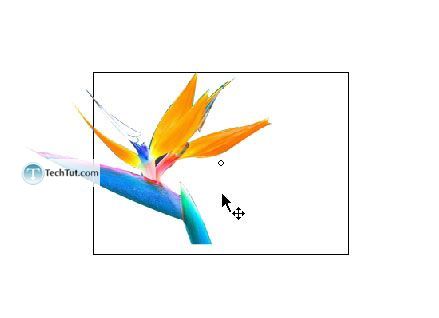
Step 5. To create the fading transition effect, we are going to be changing the “Alpha” property of the symbol so convert the image to a graphic by pressing “F8” with your image selected. Or instead of this shortcut, go to Modify > Convert to symbol…
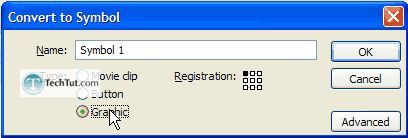
Take the time now, instead of later, to convert all the other images to graphic symbols too. Remember to unhide them and hide the ones that aren’t being converted (if necessary).
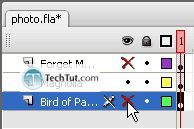
Step 6. We want to start with this image to fade in (alpha: 0-->100), then keep it solid (alpha: 100), and finally to fade out (alpha: 100-->0). We need to create a new Keyframe on our first image around 5 frames after frame #1. To create a new Keyframe either press “F6” (in the timeline with the frame selected) or go to Insert > Timeline > Keyframe.
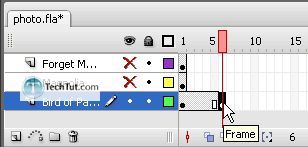
Now, the 5 frames of transition were only a rough landmark. To make sure it is exactly how long we want it, first we must consider at what fps we want this swf file to run. By default this fps is set at 12fps which means it goes through 12 <b>f</b>rames <b>p</b>er <b>s</b>econd. Though this may seem pretty fast to you, when you’re animating anything (and this is considered as animating) you want more than 12fps because at 12fps, everything is way too choppy.
I would recommend going with something like 20fps for a flash presentation or slideshow. To change the fps value, open up the Properties Window (or press “Ctrl+F3” or go to Window > Properties > Properties). On the Properties panel/window, you won’t see anything where you can change the fps until you have selected the background.

Step 7. Let’s actually create our fade in so that we can test out whether it is the right length. On the first Keyframe (on frame #1), select the first Keyframe, select the image (click it even though it looks like its selected – its not actually selected because you selected the Keyframe and not the image), then go down to the properties window/panel and in the “Color:” dropdown menu, select “Alpha”. Drop down the alpha to 0%.
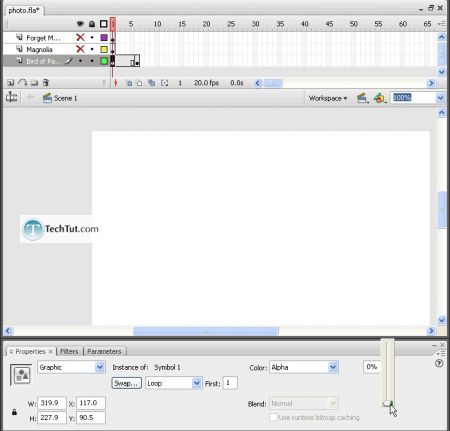
So now we got a first frame with alpha 0 and a 6th frame with alpha 100. How do we connect the two and make Flash create a transition? Exactly – a tween. We’re going to be going with a “Motion Tween” because these are already symbols.
Let’s take a break from this tutorial to distinguish between Motion Tweens and Shape Tweens.
Motion tweens can only be applied to symbols and because our images must be symbols in order to have different alpha values, we must select a Motion tween. Shape tweens, on the other hand, only apply to shapes that have not been converted to symbols. One last thing – with Shape tweens, the shapes must not be on separate layers but for Motion tweens, THEY MUST BE. This is the source of many errors by newbies using Flash.
Ok, back to the tutorial…
Right-click anywhere in between frame #1 and frame #6 then select “Create Motion Tween”. Now that we have our intro transition all made, to test it out, press “Enter” and it will run in the timeline without looping.
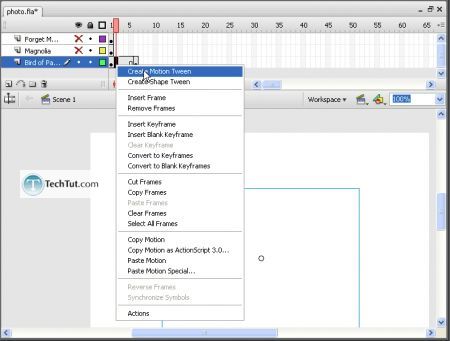
Although I think 6 frames of transition animation looks good, for the sake of teaching you how to move Keyframes, I’ll extend the number of frames of transition to 7. To move this 6th frame to frame #7, click once on the 6th frame and then click&drag to whichever frame # you want (in this case, 7 – right next to 6).
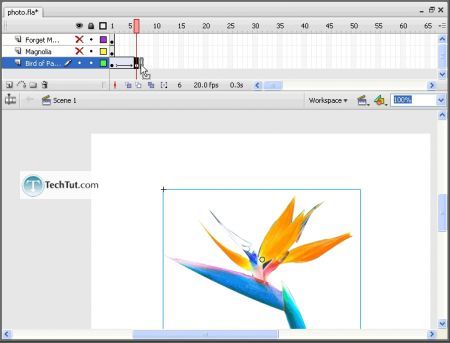
Step 8. Create a Keyframe very roughly 30 frames away then for our fading out transition, create another Keyframe 6-7 frames away. Your timeline should look a little something like this:

Set the alpha of the last frame to 0% and then create a Motion Tween exactly like our intro fading in transition. You can press “Enter” to test out the length and adjust wherever the frame length needs adjusting. Also, to move many frames all at once – highlight the frames you want to move and then click&drag to a different location.

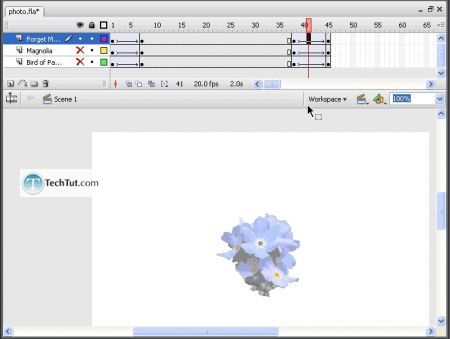
Step 9. Follow these same steps for creating transitions and the “alpha: 100” images. Next, using the method taught right above (moving groups of frames), move the frames for the second image after the first image’s transition has totally ended.
The screenshots below show my progress:


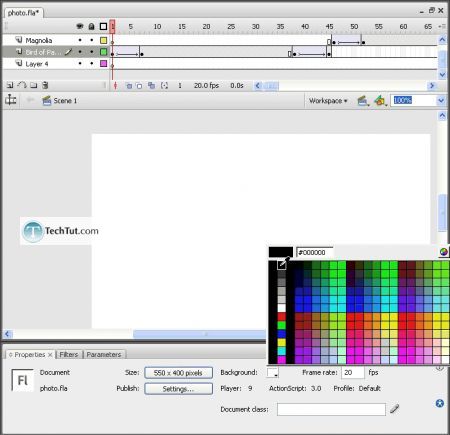
Step 10. Unhide all layers and then now lets add a background. Create a new layer below all other layers. Go back to its frame #1 and then either make a huge rectangle or just click on the background, go down to the Properties panel/window, and select your “Background:”.
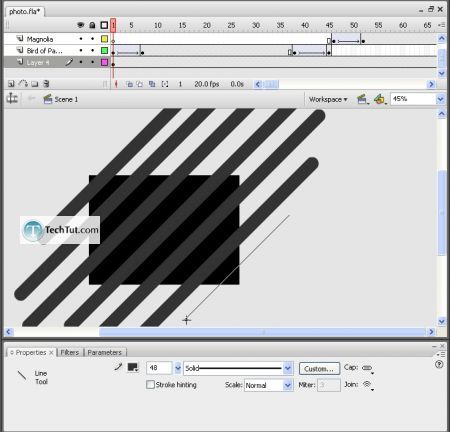
What I also like to add to the background are long fat grey lines to create a striped background.
Done!
GO to: Page 1 : Creating a Flash Photo Slideshow Tutorial
TechTut.com This tutorial is copyrighted. Partial duplication or full duplication is prohibited and illegal. Translation or usage of any kind without author�s permission is illegal.

 Join our RSS feed
Use our RSS feed to get the latest published tutorials directly to your news reader.


