Added: 15 August, 2007
Group: JavaScript
Drop-Down Menu Tutorial
Author: Mary
GO to: Page 1 : Drop Down Menu Tut
page: 1
Drop Down Menu Tut
Sort your drop down menu out. Get everything together. Customize it for your own demands. Enter here to see how it’s made.
1. First off, to get working with this kind of code, it’s really nice – and I really mean it – to get a nice editor like Notepad ++. It has tabs, syntax highlighting, smart tabbing, and loads more pizzazz.
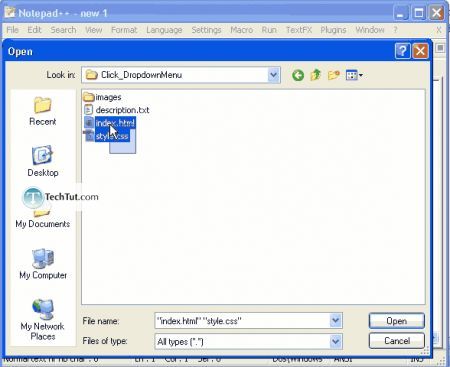
You can open multiple files at once
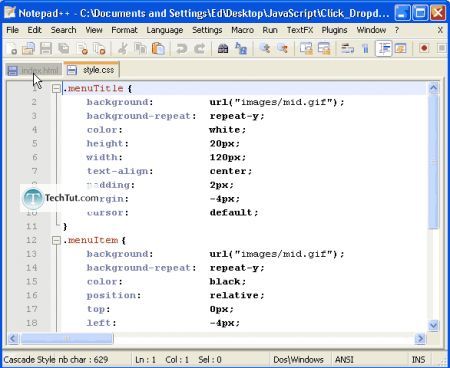
Highlighting, and also tabs
2. Second, let me just clarify that to pass through this tutorial and understand what the heck I’m saying, I really advise you to go learn HTML and CSS. Some basic programming and JavaScript syntax wouldn’t hurt either. However, I will try to explain as much as I can. Personally, I learned HTML at HTMLGoodies.com and CSS at Tizag.com. However, times are changing, if you seem to have found a better resource, I would just suggest you go with that.
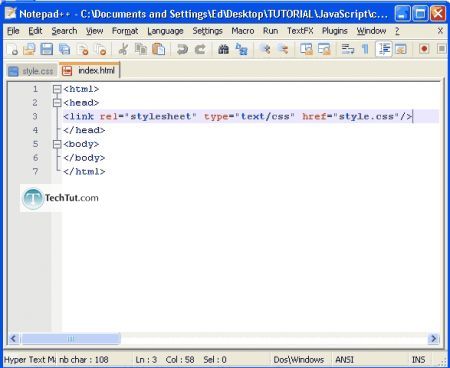
3. Let’s start. For this simple drop-down menu, we are only going to need 2 files: index.html and style.css. Create those files and then call the CSS file into the HTML file. (CSS would be referred to as an external CSS file)
Now, create your 4 menu titles such as: ‘Home’, ‘Tutorials’, ‘Gallery’, and ‘About’. Then, we’re going to add some colors, padding, etc with CSS.
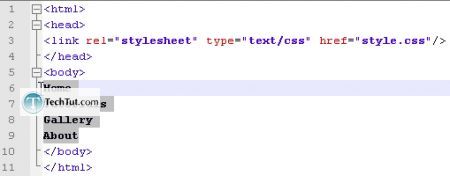
Now, let me just say that we do want them on separate lines and let me introduce to you, something called “block elements” and “inline elements”. Block elements are separated onto different lines (vertical whitespace is added) and inline elements are not separated, they stay on the same line. By default <b>,, etc are inline elements (if they weren’t, everything in front and behind those tags would have vertical whitespace between them). <span> is also an inline element while <div>,<p>, etc are block elements.
With the paragraph above in mind, to create the menu titles above, we are going to specify a <div> or <b>div</b>ision tag for each of the titles.
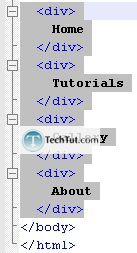
4. Because we are going to be changing all of their styles with CSS, we will be creating a class so that they can all be changed at once. A class is like…a class. If you make changes to a class, everything changes likewise that is a part of the same class. I gave them a class name of menuTitles but it can be whatever will let you know what it is best.
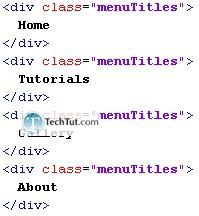
Now save, and then go to the CSS file and let’s make some changes.
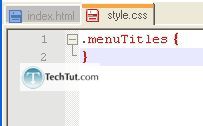
The simple code in the screenshot above is referring to all classes of “menuTitles” whether they are <div> tags or not. FYI, we could have just said “div.menuTitles” too, and it would have worked just fine. By not specifying anything however, we can change the <div> to <p> tags and the code would still apply to it.
Now, add <b>background</b>, <b>color</b>, and <b>padding</b>. If we need anything else later, we can add it later.

5. Every so often, it is a good idea to check your progress in an actual browser. Whether you have Firefox, IE, Safari, Opera, etc open up your page in your browser. Once you have, you will see that we have a little problem.
We only wanted the background to be, say, around 100px but it goes all the way across the browser! We forgot to specify a width *hangs head in shame*.
While we’re at it, let’s also add a height and text-align: center;
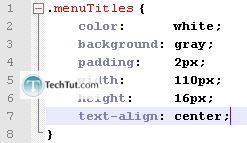
Save the CSS and then let’s refresh the page…Sweet, it works, it’s all good.
6. Now that we got that down, let’s pick up the pace and create all the menu content (in the HTML file).
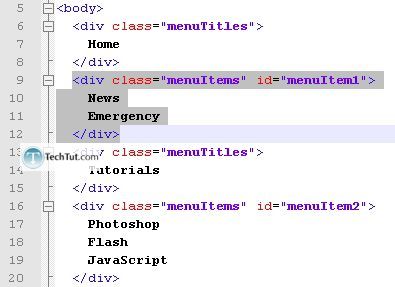
You should see the pattern by now…
By the way, add some breaks in because, not only is it good for the soul, but we want the content to look like the stuff under “Home” and not like the stuff under “Tutorials” (check out the screenshot below for what I mean).
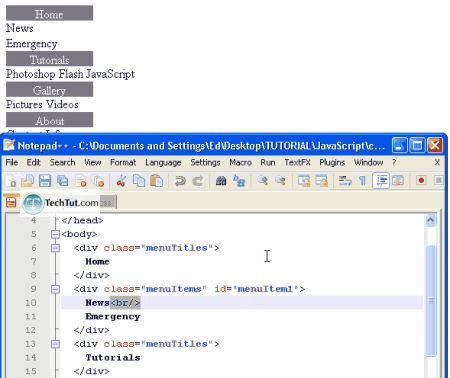
7. Back to the CSS to specify properties for our content.
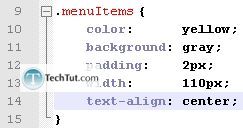
Now, check THAT in the browser and you will see some dang ugly colors but at least there are no problems.
By the way, one more thing. When the page first loads, we don’t want the content to be seen so let’s add that code right now.
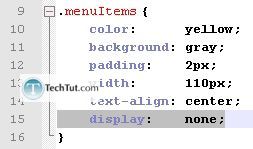
8. Save that CSS and then go back to the “index.html” file.
In the <head>…
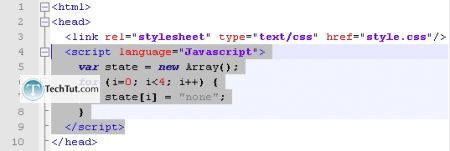
Basically, what that does is create an array (or sometimes referred to as lists) with 4 elements (that’s how many titles we have on our menu) and then each element is equal to “none”. That’s because each element (“display:none;”) is hidden currently.
Refresh that and you should still see the titles but not the content.
9. Finally for the code…
For each <div class=”menuTitles”>, add this:
onClick="javascript:if(state[1]=='none'){
document.getElementById('menuItem1').style.display='block';
state[1]='block';
}else{
document.getElementById('menuItem2').style.display='none';
state[1]='none';
}”
Basically, what that does is check the state and if it is ‘none’, then it sets the ‘display’ property of the menuItem# to ‘block’ and vice versa.
For each different menu title that you add it into for, remember to always change the number. E.g. for the second menu title, change all the 1’s to 2’s.
10. Save and Refresh and hope that it works all good…and yes, it does.
Finished.
GO to: Page 1 : Drop Down Menu Tut
TechTut.com This tutorial is copyrighted. Partial duplication or full duplication is prohibited and illegal. Translation or usage of any kind without author�s permission is illegal.

 Join our RSS feed
Use our RSS feed to get the latest published tutorials directly to your news reader.


