Added: 13 August, 2007
Group: Photoshop
Simple Reflection Tutorial
Author: Note
page: 1
Simple Reflection Tutorial
This tutorial contains several very simple steps explaining how to create reflection of an object.

Note: This tutorial works for Photoshop 7 + up, including Photoshop CS3 (the latest version of Photoshop). In fact, this tutorial was done on Photoshop CS3 but I have started using Photoshop since Photoshop 7 and this works just fine with it.
Also, note that the red-colored regions are to attract your attention to what I am talking about.
Step 1. Create a new document. File > New
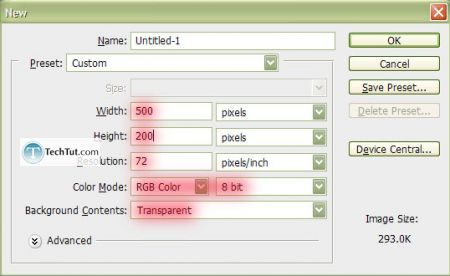
(RGB Color & 8 bit, Transparent, and choose an appropriate size). I used 500px by 200px.
Step 2. Get out you type tool

and just type whatever you want reflected. When your typing and positioning your text, just make sure to put your text in the top half of the document as you will need the bottom half for the reflection.
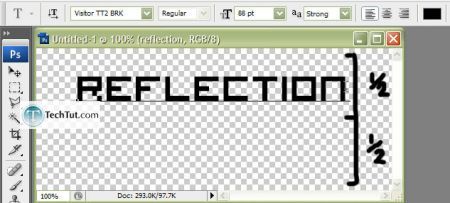
By the way, I used a font called Visitor. Look it up on Google to find it which I conveniently just did for you :) <http://www.dafont.com/visitor.font>
Step 3. Duplicate your text layer (by dragging your original layer onto the Create a new layer icon) and then place it below your original layer. To flip our duplicated layer so that it looks like a reflection, go to Edit > Transform > Flip Vertical (while having the duplicated layer selected). Then, move it down so that theyre not overlapping and leave a little bit of space.
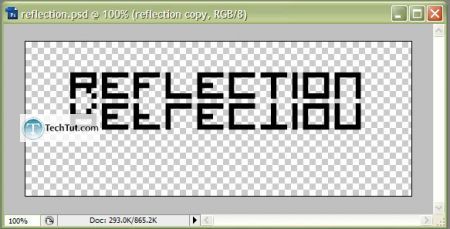
Step 4. Add a white background because the reflection is going to be hard to see on a transparent background. You should already know how to do this from the Glossy Text/Web 2.0 Style Tutorial but in case you dont Create a new layer, then place it under everything. Press D to reset to default black and white (foreground and background colors), then press X to switch the foreground and background (so white is your foreground). With the same layer still selected, press Alt + Backspace in order to fill the whole canvas with white.
Step 5. Bring down the opacity of the duplicated layer (the reflection) to 90%.
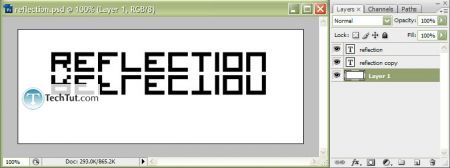
Rasterize this duplicated layer (right-click on the layer then select Rasterize Type).
Now, because reflections are not always perfect mirror images, were going to use one of the transform tools (called Perspective) in order to create a more realistic reflection. To access this tool, while having the reflection layer selected, go to Edit > Transform > Perspective. Using the bottom left and/or bottom right squares, pull them towards the center by a very small amount. Then, press the check mark (green/black check mark) to complete the transformation.
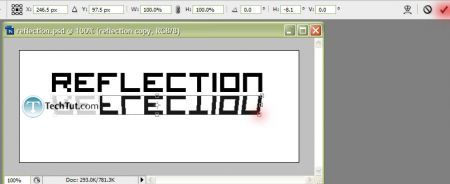
Press D (to reset foreground and background) and then press Q to enable quick mask.

The only difference that youll currently be able to see is that, in the title bar of your document, it will say Quick Mask instead of RGB.
Now, we are going to be using the Gradient Tool

in order to make the image become increasingly transparent towards the bottom of the reflection. To do this, while we are still in quick mask, create a gradient from the top of the text to the bottom of the reflection. (hint: holding down Shift will create straight lines while drawing gradients, lines, etc.)
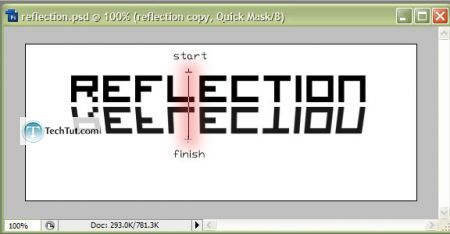
And yes, this is what it is supposed to look like:
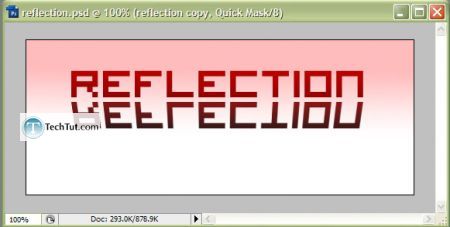
Lets continue with this extremely long step 5 -_-
Press Q again to get out of quick mask. Now it should look like this:
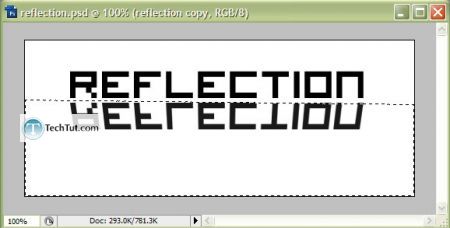
Press Del voila!
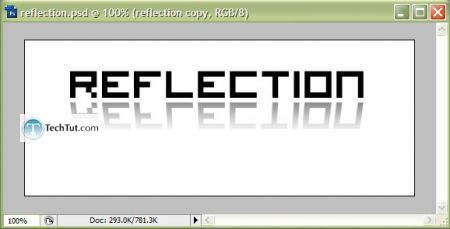
Step 6. (Yes, finally). Our final step is to create the shadow. Take the original text layer, and drag that onto the Create a new layer icon in order to duplicate it. Rasterize type the new duplicated layer.
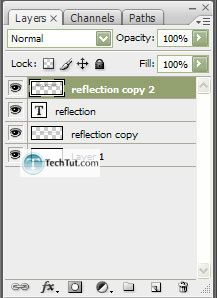
Now with your duplicated layer (rasterized), press Ctrl + T or Edit > Free Transform. In the height text box at the top, enter 20%.
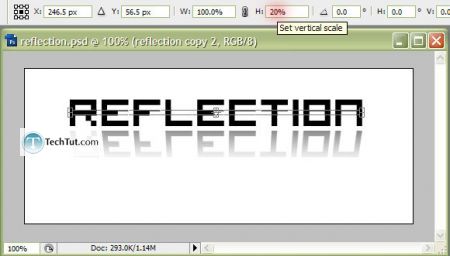
Now, bring it down between the original text and the reflection.
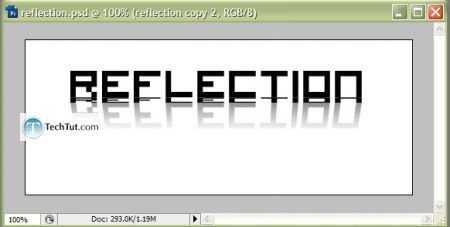
In order to make it look like a shadow, we are going to be using the Gaussian Blur Filter. Go to Filter > Blur > Gaussian Blur .
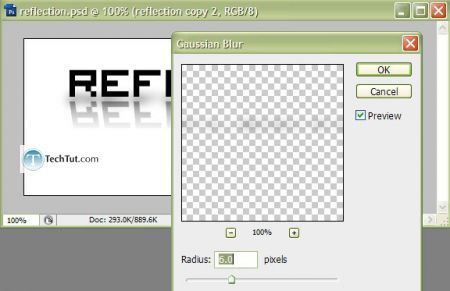
I chose to blur it by 6 px.
The shadow is way too dark and accented! We can dim it down by putting the opacity of the shadow layer down to 60% and using the Free Transform tool, make the shadow smaller and more compressed vertically.
Final:


Feel free to be creative, adding different backgrounds or changing the text color!
GO to: Page 1 : Simple Reflection Tutorial
TechTut.com This tutorial is copyrighted. Partial duplication or full duplication is prohibited and illegal. Translation or usage of any kind without author�s permission is illegal.

 Join our RSS feed
Use our RSS feed to get the latest published tutorials directly to your news reader.


