Added: 11 August, 2007
Group: Photoshop
Using Pen Tool in Photoshop
Author: John
GO to: Page 1 : Using pen tool
page: 1
Using pen tool
Once fully explored, Photoshop offers many options. The most exploited is the pen tool option. Everything you imagine materializes through the pen tool. Find out how to make your pen tool a powerful mean for creating thing in Photoshop.
Note: This tutorial works for Photoshop 7 + up, including Photoshop CS3 (the latest version of Photoshop). In fact, this tutorial was done on Photoshop CS3 but I have started using Photoshop since Photoshop 7 and this should work just fine with it.
Note: Some screenshots will have highlighted region(s) just to attract your attention to certain things. Don’t be surprised and wonder why your Photoshop doesn’t have such conveniently highlighted regions :).
This is going to be a tutorial on how to use the pen tool. The pen tool is pretty much the only way to really draw in Photoshop and once you know it, it becomes a very powerful tool. Do not try to learn this without the aid of a tutorial as you will get very frustrated :)

Step 1. Create a new document. File > New…
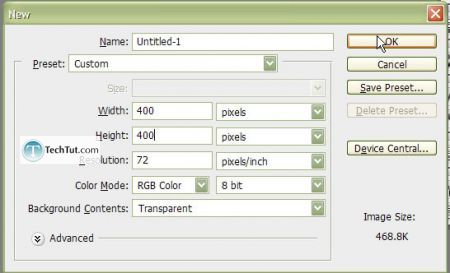
400px by 400px. 72 resolution per inch, transparent background, RGB 8 bit.
Step 2. Straight Lines
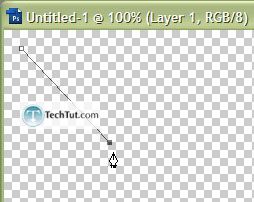
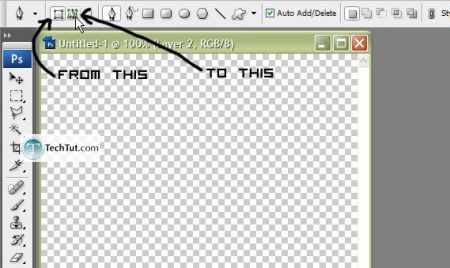
Get out your pen tool. Click once anywhere on the Photoshop document and then click again at any point on the document. As you can see, this creates a straight line. Also, now is a good point to change the way the pen tool is preset – instead of creating shapes with the pen tool, we want to create paths. Follow the instructions on the second image below.
Step 3. Deleting Paths
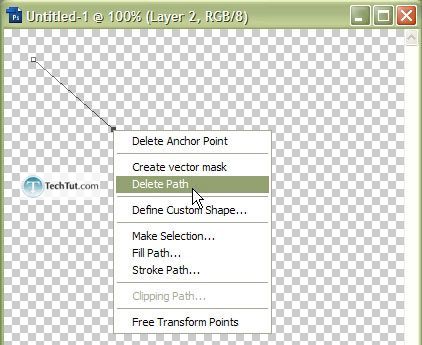
“Ctrl” + “Z”, then “Ctrl” + “Alt” + “Z”, in order to undo and then undo once more. If you were to press “Ctrl” + “Z” the second time too, it would simply redo. To get rid of the path, you could have also just right-clicked (with the pen tool) and then selected “Delete Path”.
Step 4. Curvy Lines
Click once anywhere. On this second click (anywhere else), don’t actually click then let go; click then hold and move the mouse now. The line will curve, get bigger, etc. Play around with it for a moment.
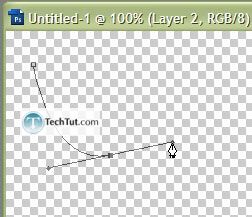
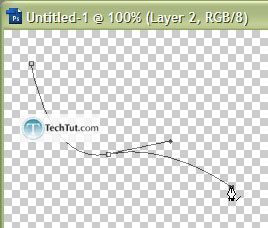
Once you have decided on a line and have stopped playing around with it, if you click again, you’ll notice that it won’t be a straight line. This second line restricts you control over it.
Step 5. Ultimatum
Finally, we have come to the time when you are ready to learn the ultimate trick. First make a curvy line, then remember how we had trouble making a straight line or a specific curve? Well now before making that second curvy/straight line, while holding down “Alt”, click on the second point.


Now when you go and try to create your second straight/curvy line, you have complete control. Muahahaha….erhm…
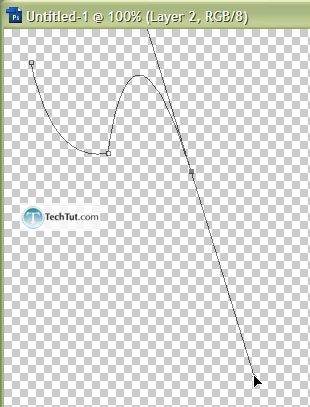
Step 6. OH NO! I made a mistake
Not to worry, there is an easy way to change any mistake you have made. In fact, you can even move the points. When you want to change the curve angle, just hold down “Ctrl” and then click on the square at the end. See the image below:
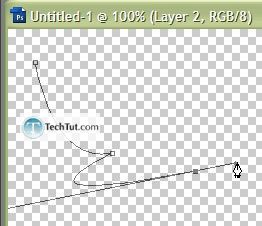
To move the points, simply hold down “Ctrl” and then drag the points to wherever you want them.
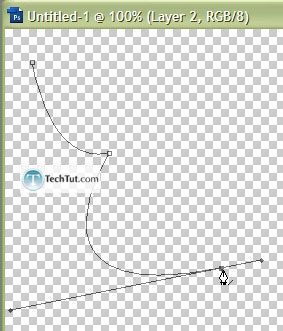
There we go. Go show those folks with tablets how its done with the Photoshop pen tool!
GO to: Page 1 : Using pen tool
TechTut.com This tutorial is copyrighted. Partial duplication or full duplication is prohibited and illegal. Translation or usage of any kind without author�s permission is illegal.

 Join our RSS feed
Use our RSS feed to get the latest published tutorials directly to your news reader.


