Added: 8 August, 2007
Group: Photoshop
Drawing a Lamp Tutorial done in Photoshop
Author: Note
page: 3
Glowing and finishing touch
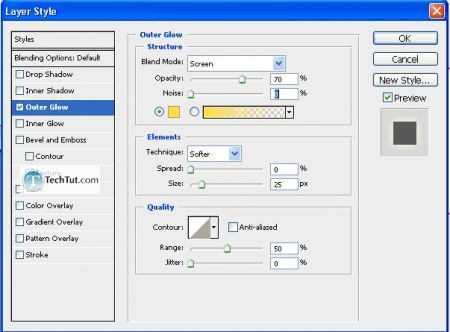
Now, add an outer glow.
![Tutorial Glowing and finishing touch 1](/img/phpThumb.php?src=16/42.gif&w=450)
![Tutorial Glowing and finishing touch 2](/img/phpThumb.php?src=16/43.gif&w=450)
Step 9. Making the top portion: first create a layer below the lamp main layer.
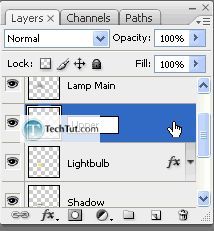
![Tutorial Glowing and finishing touch 3](/img/phpThumb.php?src=16/44.gif&w=450)
Then, make the following selection with the lasso tool.
![Tutorial Glowing and finishing touch 4](/img/phpThumb.php?src=16/45.gif&w=450)
Fill this with a gradient with these colors:
![Tutorial Glowing and finishing touch 5](/img/phpThumb.php?src=16/46.gif&w=450)
And these settings:
![Tutorial Glowing and finishing touch 6](/img/phpThumb.php?src=16/47.gif&w=450)
![Tutorial Glowing and finishing touch 7](/img/phpThumb.php?src=16/48.gif&w=450)
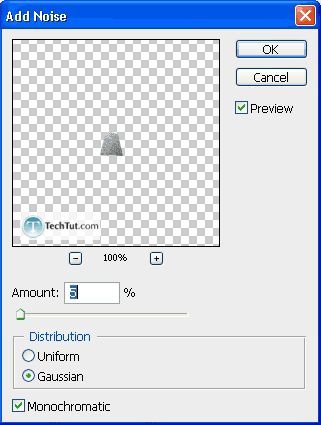
Filter > Noise > Add Noise.
![Tutorial Glowing and finishing touch 8](/img/phpThumb.php?src=16/49.gif&w=450)
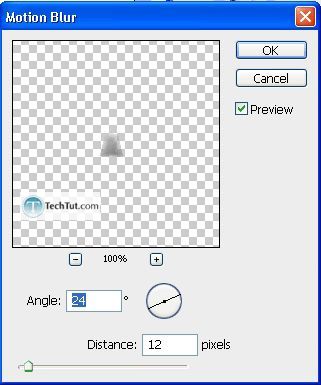
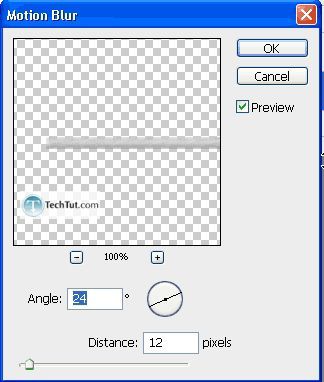
Filter > Blur > Motion Blur.
![Tutorial Glowing and finishing touch 9](/img/phpThumb.php?src=16/50.gif&w=450)
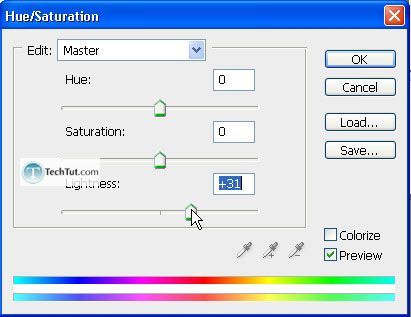
As you can see, the color is a bit off so let’s go tweak some settings: “Ctrl + U”.
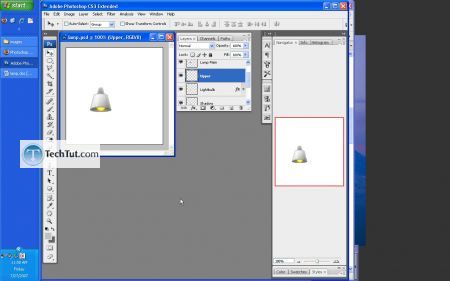
![Tutorial Glowing and finishing touch 10](/img/phpThumb.php?src=16/51.jpg&w=450)
![Tutorial Glowing and finishing touch 11](/img/phpThumb.php?src=16/52.jpg&w=450)
Step 10. Creating the bar: make a new layer below the “Upper” layer (the one we just created).
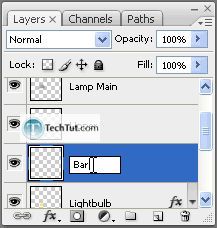
![Tutorial Glowing and finishing touch 12](/img/phpThumb.php?src=16/53.gif&w=450)
Marquee selection (rectangle) like such:
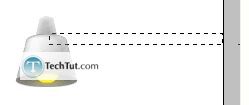
![Tutorial Glowing and finishing touch 13](/img/phpThumb.php?src=16/54.gif&w=450)
And then make a gradient with these colors:
![Tutorial Glowing and finishing touch 14](/img/phpThumb.php?src=16/55.gif&w=450)
And these settings:
![Tutorial Glowing and finishing touch 15](/img/phpThumb.php?src=16/56.gif&w=450)
Fill:
![Tutorial Glowing and finishing touch 16](/img/phpThumb.php?src=16/57.gif&w=450)
Ctrl + Click and then Filter > Noise > Add Noise.
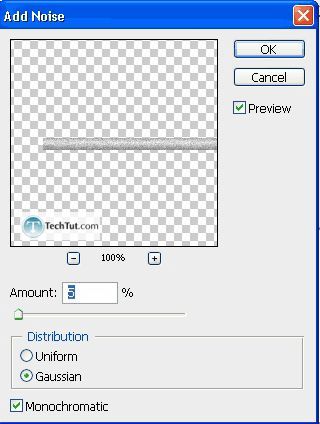
![Tutorial Glowing and finishing touch 17](/img/phpThumb.php?src=16/58.gif&w=450)
Then, Filter > Blur > Motion Blur.
![Tutorial Glowing and finishing touch 18](/img/phpThumb.php?src=16/59.gif&w=450)
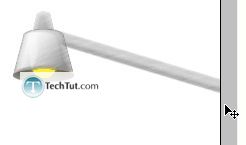
Ctrl + T for free transform and then slightly rotate it.
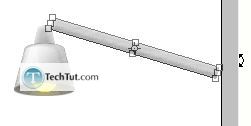
![Tutorial Glowing and finishing touch 19](/img/phpThumb.php?src=16/60.gif&w=450)
And then move it down a bit…
![Tutorial Glowing and finishing touch 20](/img/phpThumb.php?src=16/61.gif&w=450)
And hooray! We’re done.
Final:
![Tutorial Glowing and finishing touch 21](/img/phpThumb.php?src=16/62.gif&w=450)
GO to: Page 1 : Drawing a lamp
GO to: Page 2 : Create a bulb and putting it up together
GO to: Page 3 : Glowing and finishing touch
TechTut.com This tutorial is copyrighted. Partial duplication or full duplication is prohibited and illegal. Translation or usage of any kind without author�s permission is illegal.
![](/images/banner.jpg)
![](/images/rss.gif)
Use our RSS feed to get the latest published tutorials directly to your news reader.
![Add to Google](http://buttons.googlesyndication.com/fusion/add.gif)
![](/images/content_top.gif)
![Tutorial LOGO TechTut](/images/logo.jpg)
![Best tutorials for maya 3d max photoshop and more](/images/slogan.gif)