Added: 31 October, 2007
Group: Poser
Poser tools for changing poses
Author: TechTut.com
page: 1
Tools for changing poses part 1
In this tutorial we will show you how to use Poser tools for changing poses.
The camera
There are two types of cameras: conic and isometric.
Conic cameras (for example, the main camera, frontal) behave as usual cameras:
they display perspective. Isometric cameras
("at the left", "on the right", etc.) have no perspective.
If you use isometric cameras, you cannot rotate on a working area.
The main camera (Main Camera):
For transition in main camera press Ctrl+M, camera manipulators are on the main panel:

Sphere with 4 arrows for rotating camera around the axes:

Hands move camera to the right, to the left, back and forth:

The hand with palm, moves camera upwards, downwards, to the right, to the left:

The hand on the right, moves camera to the right, to the left, forwards, back:

About focal distance
By default cameras in Poser correspond to 25-mm cameras with wide-angel objective.
You can experiment with camera focal length, for example,
about 50 mm (corresponds to an eye focal length) and 100ìì (a portrait photo).
Tracking modes

There are three modes of tracking:
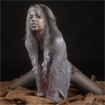
1. Box, objects are displayed such as boxes:

2. Fast, displays the real surface of the object,
but at movement of the camera part of figures replacing with boxes:

3. Full, objects are always displayed as a real surface:

GO to: Page 1 : Tools for changing poses part 1
GO to: Page 2 : Tools for changing poses part 2
GO to: Page 3 : Tools for changing poses part 3
TechTut.com This tutorial is copyrighted. Partial duplication or full duplication is prohibited and illegal. Translation or usage of any kind without author�s permission is illegal.


 Join our RSS feed
Use our RSS feed to get the latest published tutorials directly to your news reader.