Added: 11 January, 2008
Group: Cinema 4D
How to create a jug in Cinema 4D
Author: TechTut.com
GO to: Page 1 : Model a jug
GO to: Page 2 : Polygons and nurbs for jug
GO to: Page 3 : Final modeling and rendering
GO to: Page 2 : Polygons and nurbs for jug
GO to: Page 3 : Final modeling and rendering
page: 3
Final modeling and rendering
22. Press right mouse button and select tool Knife:

23. Make such cuts:

24. Select new polygons:

25. Select tool Extrude and apply it with Offset 0:

26. Select top of polygons and increase scale, same with bottom part, here result:

27. Apply to Box modifier HyperNURBS:

28. Increase Subdivision Editor and Subdivision Renderer:

29. Create new material, color - clay, for material assignment simply drag it on the object:

30. At tab Basic check Bump, go to next tab Bump,
press on arrow after Texture and select Bump. Number Strength set 2. Press on Noise:

31. Number Global Scale set 30 %, here result:

32. Put some light sources and floor:

33. To have shadows, select a light source, go to tab Shadow and instead of None,
select other way of settings light:

34. To render press Render in Picture Viewer:

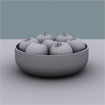
35. Final result:

GO to: Page 1 : Model a jug
GO to: Page 2 : Polygons and nurbs for jug
GO to: Page 3 : Final modeling and rendering
TechTut.com This tutorial is copyrighted. Partial duplication or full duplication is prohibited and illegal. Translation or usage of any kind without author�s permission is illegal.


 Join our RSS feed
Use our RSS feed to get the latest published tutorials directly to your news reader.